
1. 인증서 발급
설정파일 다운로드
$ git clone https://github.com/hibuz/nginx-certbot.git개발 PC 에서 sshcode 실행
$ sshcode ubuntu@hibuz.comnginx-certbot 폴더를 열어서 init-letsencrypt.sh 파일과 data/nginx/app.conf 파일을 자신의 도메인에 맞게 변경합니다.
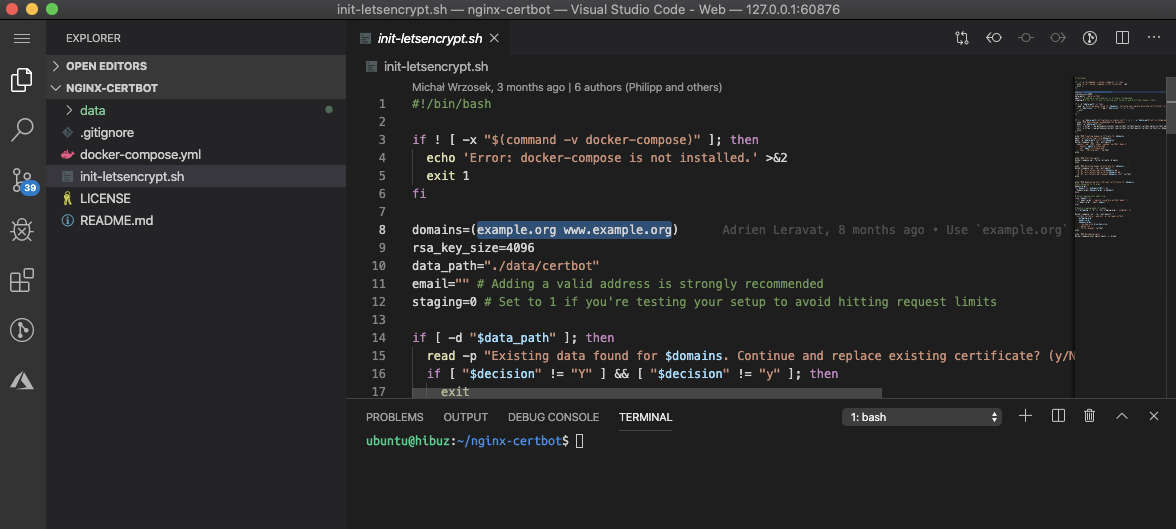
domains=(example.org www.example.org)
email="" # Adding a valid address is strongly recommendedserver {
listen 80;
server_name hibuz.com; #<- 여기
server_tokens off;
...
}
server {
listen 443 ssl;
server_name hibuz.com; #<- 여기
server_tokens off;
ssl_certificate /etc/letsencrypt/live/hibuz.com/fullchain.pem; #<- 여기
ssl_certificate_key /etc/letsencrypt/live/hibuz.com/privkey.pem; #<- 여기
...
}반드시 방화벽 설정 을 한 다음 인증서 발급 스크립트 실행합니다. 방화벽 미 설정시 인증서 발급이 실패합니다. (./init-letsencrypt.sh)
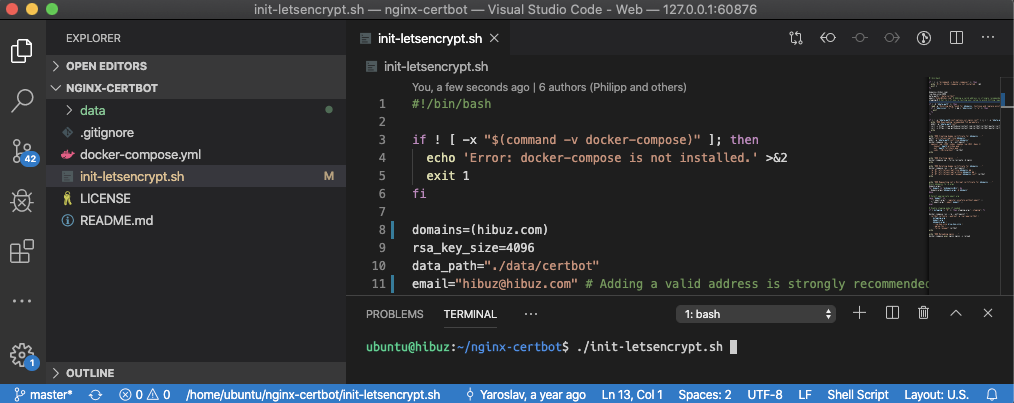
ubuntu@hibuz:~/nginx-certbot$ ./init-letsencrypt.sh
### Downloading recommended TLS parameters ...
### Creating dummy certificate for hibuz.com ...
Creating network "nginx-certbot_default" with the default driver
Pulling certbot (certbot/certbot:)...
latest: Pulling from certbot/certbot
c9b1b535fdd9: Pull complete
2cc5ad85d9ab: Pull complete
61614c1a5710: Pull complete
0522d30cde10: Pull complete
407da27a0336: Pull complete
b63a4f7ce95d: Pull complete
ab40fb88f5b7: Pull complete
605448d8e8f9: Pull complete
03958c6b08b9: Pull complete
ceef1228bad4: Pull complete
be9eccf787ef: Pull complete
Digest: sha256:ba624186374c7e10191f7c70702c9dd059c9e9cade0ed8e800625e0aa5f55977
Status: Downloaded newer image for certbot/certbot:latest
Generating a RSA private key
............+++++
.+++++
writing new private key to '/etc/letsencrypt/live/hibuz.com/privkey.pem'
-----
failed to resize tty, using default size
### Starting nginx ...
Pulling nginx (nginx:1.17-alpine)...
1.17-alpine: Pulling from library/nginx
4167d3e14976: Pull complete
db94a93dfca0: Pull complete
Digest: sha256:9e81b8f9cef5a095f892183688798a5b2c368663276aa0f2be4b1cd283ace53d
Status: Downloaded newer image for nginx:1.17-alpine
Creating nginx-certbot_nginx_1 ... done
### Deleting dummy certificate for hibuz.com ...
failed to resize tty, using default size
### Requesting Let's Encrypt certificate for hibuz.com ...
Saving debug log to /var/log/letsencrypt/letsencrypt.log
Plugins selected: Authenticator webroot, Installer None
- - - - - - - - - - - - - - - - - - - - - - - - - - - - - - - - - - - - - - - -
Would you be willing to share your email address with the Electronic Frontier
Foundation, a founding partner of the Let's Encrypt project and the non-profit
organization that develops Certbot? We'd like to send you email about our work
encrypting the web, EFF news, campaigns, and ways to support digital freedom.
- - - - - - - - - - - - - - - - - - - - - - - - - - - - - - - - - - - - - - - -
(Y)es/(N)o: Y
Obtaining a new certificate
Performing the following challenges:
http-01 challenge for hibuz.com
Using the webroot path /var/www/certbot for all unmatched domains.
Waiting for verification...
Cleaning up challenges
IMPORTANT NOTES:
- Congratulations! Your certificate and chain have been saved at:
/etc/letsencrypt/live/hibuz.com/fullchain.pem
Your key file has been saved at:
/etc/letsencrypt/live/hibuz.com/privkey.pem
Your cert will expire on 2020-05-26. To obtain a new or tweaked
version of this certificate in the future, simply run certbot
again. To non-interactively renew *all* of your certificates, run
"certbot renew"
- If you like Certbot, please consider supporting our work by:
Donating to ISRG / Let's Encrypt: https://letsencrypt.org/donate
Donating to EFF: https://eff.org/donate-le
### Reloading nginx ...
2020/02/26 01:54:49 [notice] 10#10: signal process started
ubuntu@hibuz:~/nginx-certbot$ docker ps
CONTAINER ID IMAGE COMMAND CREATED STATUS PORTS NAMES
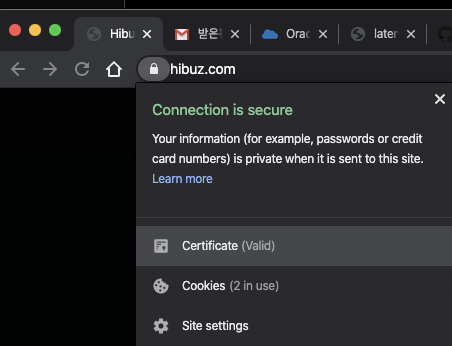
775647951ef3 nginx:1.17-alpine "/bin/sh -c 'while :…" 6 minutes ago Up 6 minutes 0.0.0.0:80->80/tcp, 0.0.0.0:443->443/tcp nginx-certbot_nginx_1https 접속이 가능한지 확인합니다.
2. Ghost 설정
구동중인 인증서 발급용 컨테이너를 삭제합니다.
~/nginx-certbot$ docker-compose down
Stopping nginx-certbot_nginx_1 ... done
Removing nginx-certbot_nginx_1 ... done
Removing network nginx-certbot_default
~/nginx-certbot$
docker-compose.yml 파일에 ghost 정보를 추가합니다. (내용중 ghost url 환경변수는 본인에 맞게 수정 필요)
version: '3'

services:
  ghost:
    image: ghost:3.7
    restart: always
    container_name: ghost
    network_mode: "bridge"
    volumes:
      - ./data/ghost/content:/var/lib/ghost/content:z
    environment: # this section can be commented to start in dev mode by default
      - url="https://hibuz.com" # change this
  nginx:
    image: nginx:1.17-alpine
    restart: always
    container_name: nginx
    network_mode: "bridge"
    links:
      - ghost
    volumes:
      - ./data/nginx:/etc/nginx/conf.d
      - ./data/certbot/conf:/etc/letsencrypt
      - ./data/certbot/www:/var/www/certbot
    ports:
      - "80:80"
      - "443:443"
    command: "/bin/sh -c 'while :; do sleep 6h & wait $${!}; nginx -s reload; done & nginx -g \"daemon off;\"'"
  certbot:
    image: certbot/certbot
    restart: always
    volumes:
      - ./data/certbot/conf:/etc/letsencrypt
      - ./data/certbot/www:/var/www/certbot
entrypoint: "/bin/sh -c 'trap exit TERM; while :; do certbot renew; sleep 12h & wait $${!}; done;'"- network_mode: "bridge" : docker-compose 는 기본적으로 별도의 bridge 네트워크를 생성해서 각 컨테이너에 생성한 네트워크 대역의 ip를 할당합니다. network_mode를 bridge 로 설정하면 docker run 으로 실행 시킨 컨테이너와 같은 대역의 ip로 서로 통신이 가능하므로 편의상 설정
- restart: always: 컨테이너가 비정상적으로 종료되거나 서버가 재부팅 되어도 컨테이너를 자동으로 시작되므로 블로그 운영이 편리함
- container_name: nginx: 자동 생성되는 이름을 사용해도 되지만 docker restart nginx 로 app.conf 를 변경하고 재시작을 편하게 하거나 docker exec -it nginx sh 로 컨테이너에 접속하기도 좋음
- volumes:
- ./data/ghost/content:/var/lib/ghost/content:z
ghost 버전을 증가 시키거나 데이터를 쉽게 백업이 가능하도록 host 디렉토리를 mount 해서 파일db(sqlite) 및 컨텐츠등을 기록합니다. (컨테이너가 삭제되어도 데이터는 유지) 또한 데이터를 정기적으로 S3에 백업받도록 하는 설정하는법 포스팅 예정 - links:
- ghost
nginx 에서 host 이름으로 통신이 가능하도록 설정합니다. 만약 ip로 설정한다면 생략 가능 (외부 컨테이너를 reverse proxing 하려면 external_links 로도 지정 가능)
data/nginx/app.conf 에 Reverse proxy 설정 추가 (내용중 domain 주소는 본인에 맞게 수정 필요)
server {
    listen 80;
    server_name hibuz.com;
    server_tokens off;

    location /.well-known/acme-challenge/ {
        root /var/www/certbot;
    }

    location / {
        return 301 https://$host$request_uri;
    }
}

server {
    listen 443 ssl;
    server_name hibuz.com;
    server_tokens off;

    ssl_certificate /etc/letsencrypt/live/hibuz.com/fullchain.pem;
    ssl_certificate_key /etc/letsencrypt/live/hibuz.com/privkey.pem;
    include /etc/letsencrypt/options-ssl-nginx.conf;
    ssl_dhparam /etc/letsencrypt/ssl-dhparams.pem;

    location / {
        proxy_pass http://ghost:2368;
        proxy_set_header    Host                $http_host;
        proxy_set_header    X-Real-IP           $remote_addr;
        proxy_set_header    X-Forwarded-For     $proxy_add_x_forwarded_for;
        proxy_set_header    X-Forwarded-Proto   $scheme;
        client_max_body_size    10m;
    }
}ghost를 적용하기 위해 변경한 docker-compose.yml 및 app.conf 변경사항 확인
Add ghost · hibuz/nginx-certbot@d5dc120
Boilerplate configuration for nginx and certbot with docker-compose - hibuz/nginx-certbot

컨테이너 실행 및 확인
~/nginx-certbot$ docker-compose up -d
~/nginx-certbot$ docker ps
CONTAINER ID IMAGE COMMAND CREATED STATUS PORTS NAMES
786f28da2ce9 nginx:1.17-alpine "/bin/sh -c 'while :…" 9 seconds ago Up 7 seconds 0.0.0.0:80->80/tcp, 0.0.0.0:443->443/tcp nginx
fc159e7ea05e ghost:3.7 "docker-entrypoint.s…" 12 seconds ago Up 9 seconds 2368/tcp ghost
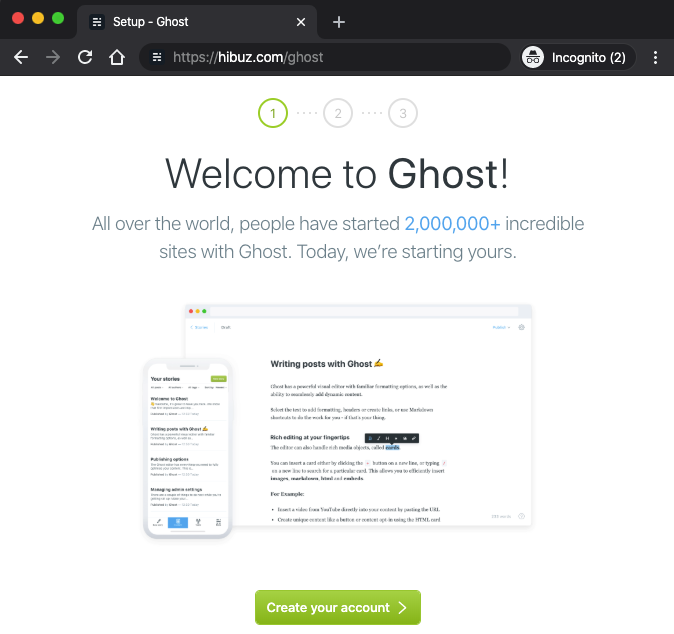
283dff7bddf9 certbot/certbot "/bin/sh -c 'trap ex…" 12 seconds ago Up 9 seconds 80/tcp, 443/tcp nginx-certbot_certbot_1이제 블로그 설정이 끝났습니다. 관리자 계정을 생성하고 블로그를 시작해 보세요~(https://your_domain/ghost)